
Gone are the days when carrying a bouquet definitely meant you were carrying a bunch of cut flowers bound together at their stems. Sure, some brides still choose fresh florals for their bouquets, but there are also so many alternative options out there for creating a handheld accessory for your wedding day. One that we've seen quite a bit lately is the button bouquet.
And while we like to dabble in DIY here at TWB, we're always scouring the web for instructions and tutorials from others who have already conquered a particular project. Why re-invent the wheel, right? This is where Danielle from DSMeeBee comes into play. She has a craft-centric blog that is full of projects with easy-to-follow steps. It's *so* right up our alley and we love checking back to see what she's been working on recently.
Read on to see DSMeeBee's tutorial for a "One Of A Kind Button Bouquet," and let us know if you're ready to take on a project like this after reading through the steps.


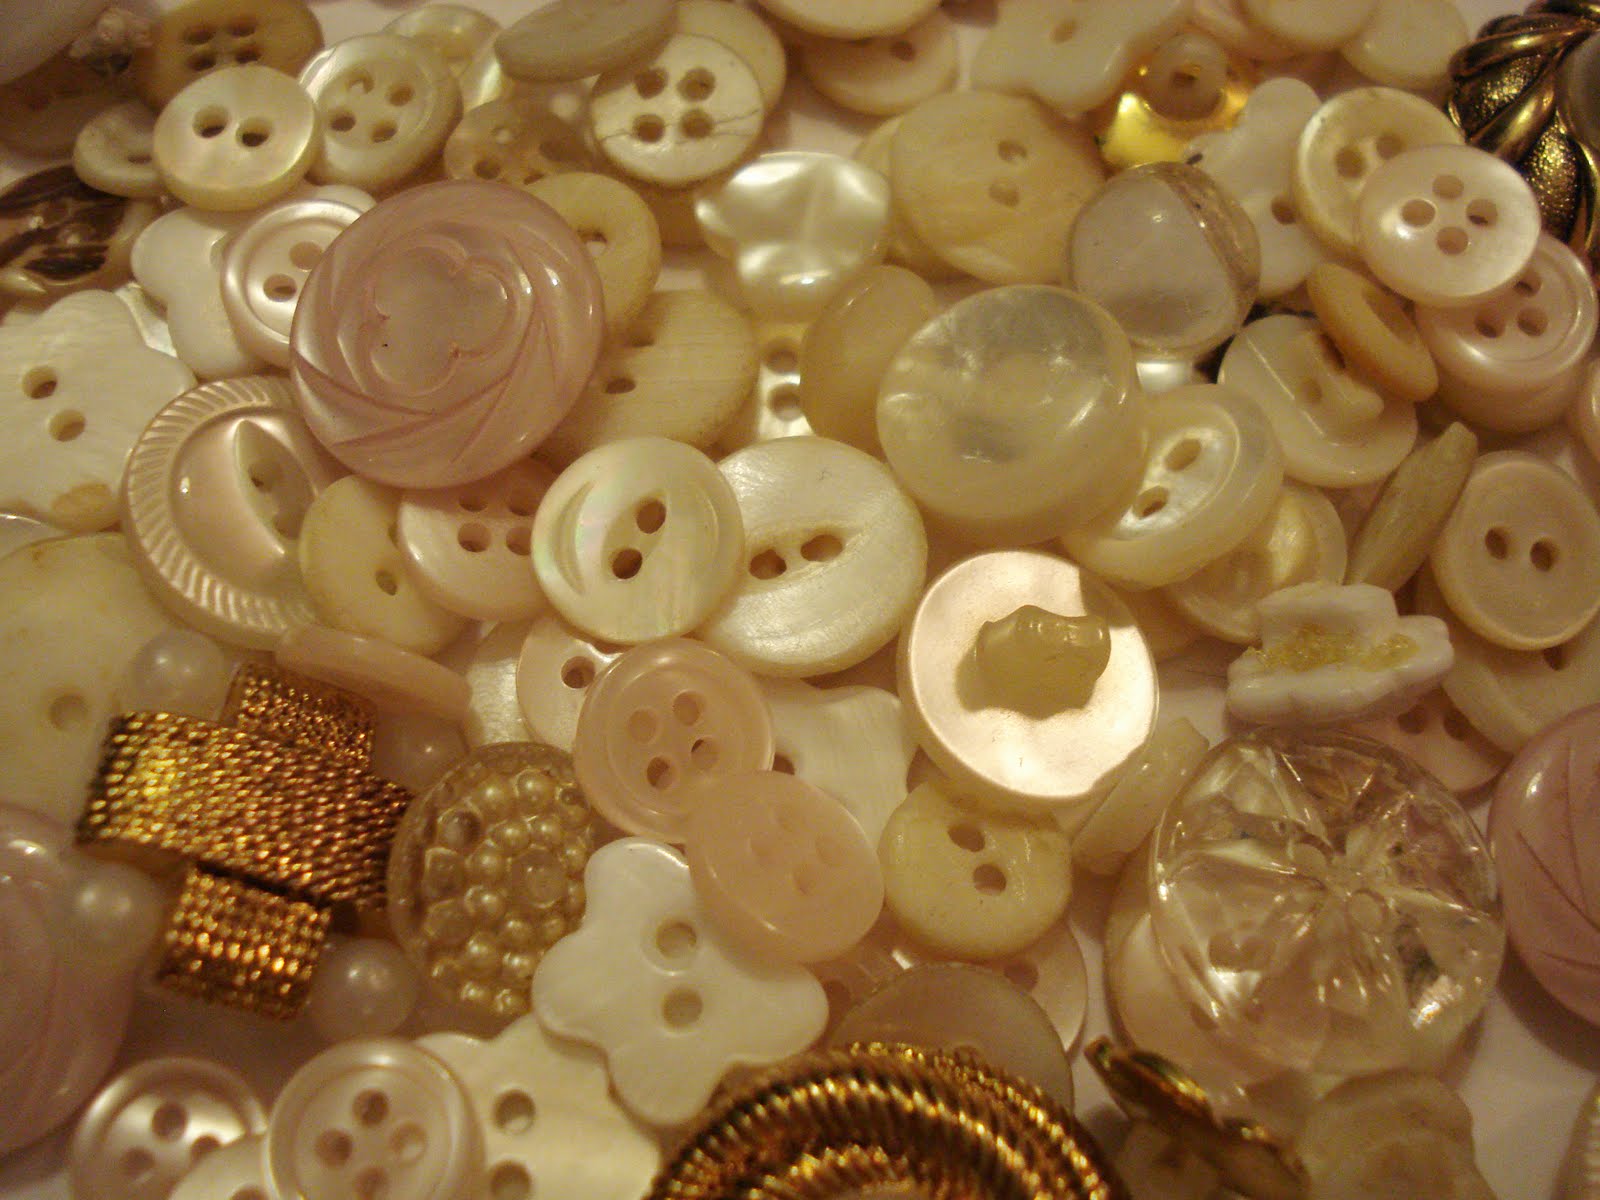
Step 1: Collect your materials.
Vintage and Children's Buttons from Ebay - $ 60
I bought button "lots" - which are just large amounts of buttons in the colors I wanted for filler buttons and then bought special buttons that I knew would accent my bouquet.
One rose pendent from Ebay - $ 1
Using things other than buttons to offset the size in the bouquet worked well for me.
Gorilla glue from Michael's Crafts - $ 10
You could get it in any hardware/craft store, one thing I don't really like about this glue is that when it dries it expands which can create a mess. So I would recommend finding another multi-purpose glue that will glue plastic.
Floral wire from Michael's Crafts - $ 5
Get a gauge that is easy to work with but still strong enough to hold 3-4 glued buttons up right. Also I went to several stores to find white floral wire or really any white wire that would be the right gauge and found nothing. So I ended up using green wire and painting each steam. This is just another step so if you can find white or gold I would go with with that, unless you want green.
White floral wire from Walmart - Two for $ 1 - $ 5
The white floral wire at Walmart was very flimsy and I knew the gauge would not hold up 3-4 buttons. I bought this wire for the filler buttons, since it was so easy to work and I knew I would need a lot of filler buttons.
Plastic and Foam Bouquet Handle from Michael's Crafts - $ 4
I am not sure what to call this thing......it basically looks like a little toilet bowl scrubber. It is a plastic handle with round dense foam at the end of it. You could probably make one but I found that this one was very easy to use and strong.
Grand Total: $ 85
Things from around the house:
· Scissors
· Wire Cutters
· Super Glue
· Wax Paper - To cover the table with
· Vase - I found a vase helpful while assembling
· Cleared Table - Space where you could leave things to dry overnight.
Personal Touches:
Excess fabric from my wedding dress when I got it hemmed (to cover the handle)
Family portrait pendent from when I was 5 years old.
Step 2: BUTTONS!
After you have collected all your buttons and materials sort out the buttons that will be fillers and what will to accents. I used plastic baggies for this so I could see what I had.
Step 3: Gluing Accent Buttons Together
After stacking the accent buttons that I thought looked good together I used super glue to glue them in stacks. Careful not to use too much or glue will go through the button holes and end up glued to your table.

Step 4: Forming the Wire Steams and Gluing Them to the Assembled Buttons
I cut the floral wire to 6-7 inch lengths and made about 40-50 of them. I then took each one of the "steams" and curled one end around my pointer finger. After the wire had a curly end I would match it up with an assembled button stack and match the curly end to the size of the base button. By flattening the curly end of the steam to the size of the desired button stack I make sure each steam stood curly end down by itself. After the wire stood upright by itself I flipped the already glued assembled buttons face down and glued the steam with a drop of Gorilla glue.

Step 5: Making Filler Buttons
For me the filler buttons were just as important as the accent buttons because they are what makes the bouquet look lush and full. I used very light gauge wire which I threaded through the button holes and twisted the wire back on itself to make a steam. Then after I made several I twisted the individual filler buttons together to make a baby bouquet.

Step 6: Assembling the Bouquet!!!!!
After you have a good amount of accent buttons glued to stems and filler buttons twisted together then it is time to assemble. Since this was the first button bouquet I ever made I did a dry no glue run first. I stuck the accent buttons into the foam end of the bouquet handle and started to fill it in. After I got a bunch arraigned into the foam bouquet form I realized I would need more for the look I wanted. My bouquet is medium size but it is pretty heavy so that is why I stopped. I found using a vase was a way helpful way to prop up the bouquet form while arraigning the buttons.


Step 7: Final Assembly
After determining how many filler and accent buttons I needed to make and then arraigning them in the way I thought looked good. I was finally ready to glue all the buttons into the bouquet handle. As in step 5 I stuck the wire steams into the foam handle but this time I dipped the ends into some Gorilla glue. For this step I found Gorilla glue to be the best choice. After letting everything dry overnight in the vase those babies weren't going anywhere!


Step 8: Personal Touches
My personal touches will be wrapping the ugly plastic handle with excess fabric that will be cut off my wedding dress when I get it hemmed. I also have a little gold family portrait pendent that was taken when I was about 5 years old that I will attach to the handle.
Step 9: ENJOY!!!
Although this bouquet cost me about $85 and several days to make….I believe it is worth the hard work. I have seen several different button/felt/broach/feather bouquets on etsy.com that start around $200, so if you have the time then it will be worth your while to make your own.
On my wedding day I will have a unique and beautiful bouquet that has sentimental personal touches that I know I could never find in a store. Since the buttons will never go bad I will keep my bouquet as a wedding keepsake. So needless to say the tradition of tossing the bride’s bouquet over her head will not be happening at my wedding….sorry single ladies!
Super cute! What a great personal touch + keepsake!
ReplyDeleteReally cute! I love bouquet alternatives. And $85 is WAY cheaper than an actual bouquet that will die.
ReplyDeleteGreat tutorial! I might have to make a little one just for fun :)
ReplyDelete